JDM K24A SWAP 8TH GEN CIVIC SI – PART 3: The Conversion
After sourcing our new JDM RBB K24A engine and removing the original K20Z3 it was time to start the process to convert the RBB K24A to the FG2/FA5 chassis.
We wanted to convert the RBB K24A to use all original 8th gen Si parts. Ensuring the new power plant maintains all original 8th gen Civic Si hoses, belts, and harness with no modifications allows for easy part sourcing and future maintenance. We wanted to build a K24 8th Gen Si, for long lasting daily driving, the way Honda would have built it, an OEM+ K24A 8th generation Civic (FG2/FA5) build.
Honda's RBB K24A engine is a perfect upgrade compared to the K20Z3 in a daily driven 2006-2011 Civic Si. While the engine does not maintain the square bore/stroke ratio that allow the K20's to easily achieve 10k RPM glory, the added torque (+ 30 lb·ft) due to the deep stroking 2.4L adds a perfect upgrade for a daily driver. The RBB K24A also provides a cheaper alternative for long block sourcing compared to the K20Z3 and requires less modification than a K20A2 and K20Z1 engine from the RSX type S.
The RBB K24A in it's original state does not plug and play into the 8th gen Civic Si chassis, it requires using certain parts from the K20Z3 engine for a plug and play conversion. Luckily the RBB K24A head and block accept all the K20Z3 components needed without any modification or after market adapters, a happy Honda coincidence.
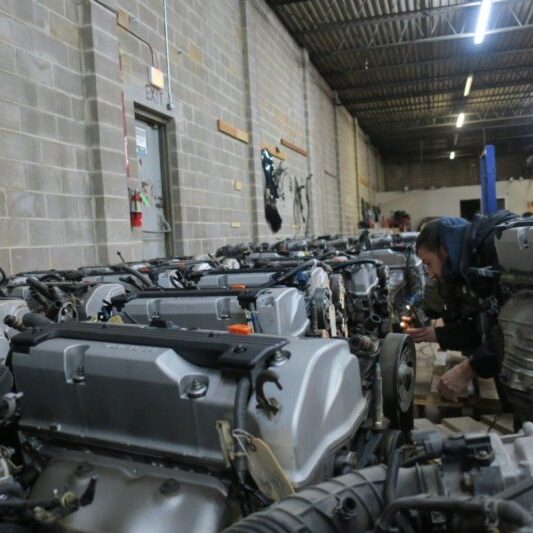
The JDM RBB K24A engine is a "3 lobe" VTEC engine with 10.5:1 compression similar to the 2004-2005 USDM Acura TSX K24A2 engine. Due to the popularity of the engine the RBB K24A was used in multiple vehicles in Japan. It is cheap and easy to source from any JDM Engine Importer unlike the K20Z3. The RBB K24A also requires less "custom" adapter parts to integrate into the 8th gen Civic(FG2/FA5) chassis. The RBB head accepts RBC intake manifolds without any need for modification unlike K20A(K20A2) and K20Z1 heads.
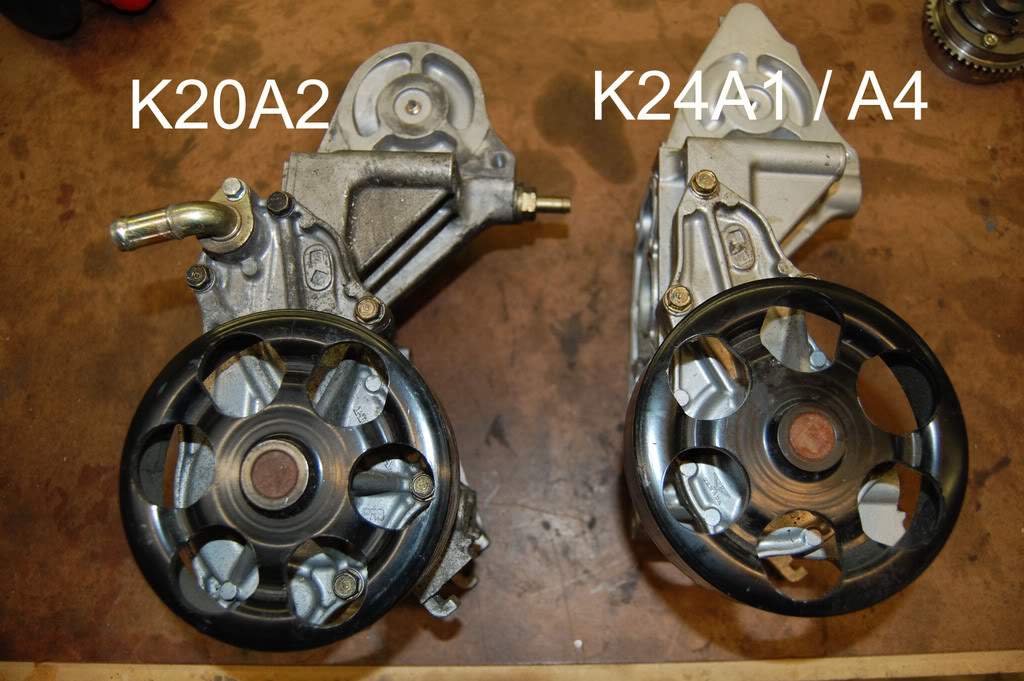
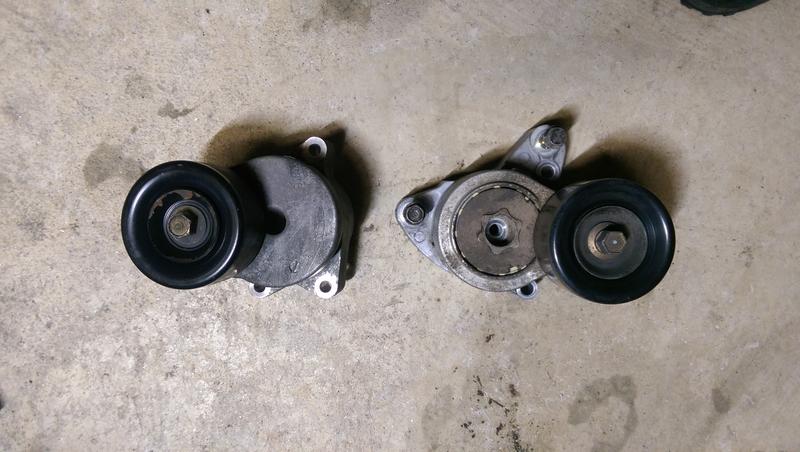
Because of the wide use, variations exist in power steering/EPS design, water pump housing, and oil cooling designs to satisfy all chassis. One major difference is in the water pump housing and how the alternator and power steering pump mount to it, making some RBB K24A water pump housings incompatible with USDM tensioners, power steering pumps, and idler pulleys found on most USDM K-series engines.
We wanted to take improvements found in the K20Z3 engine as well as convert the RBB K24A to use all original 8th gen Si parts. Ensuring the new power plant maintains all original 8th gen Civic Si hoses, belts, and harness with no modifications allows for easy part sourcing and future maintenance.
Improvements such as the higher flow RBC intake manifold and 50° VTC gear will allow to better tune the new deeper stroking RBB K24A. The oil cooler will ensure the engine stays at optimal temps when needed. The RBB head has slightly less flow than the K20Z3 RBC head. We chose to keep the RBB head as the difference in performance is marginal for Daily Driving Street Application. Keeping the RBB K24A head and cams also reduces the amount of work necessary to make the RBB K24A a plug and play swap.
Conversion Preparation
It is easier to mount both engines on an engine stand for the conversion. This helps identify differences between the K20Z3 and RBB K24A engines during the conversions as well as eliminate chance of mixing parts up. Most Auto Part Stores have a tool lending program, which includes engine hoists and stands.
1. Remove Engine wire harness from K20Z3 Engine/Trans Assembly.
2. Remove Evap selenoid and Brake Booster Piping from valve cover.
3. Remove Transmission from K20Z3
4. Remove Clutch and Flywheel from K20Z3
5. Place K20Z3 on Engine Stand
6. Remove Flex Plate from RBB K24A
7. Remove any wire harness from RBB K24A
8. Place RBB K24A on engine stand
Conversion Parts Lists
To complete the conversion and ensure parts can be easily sourced in the future we have chosen to retain as many of the K20Z3 components as possible. This helps maintain the vehicle in the future by reducing "one off" parts that need to be sourced and eliminating the need to retain a specified list of components used in the swap.
Motor Mounts
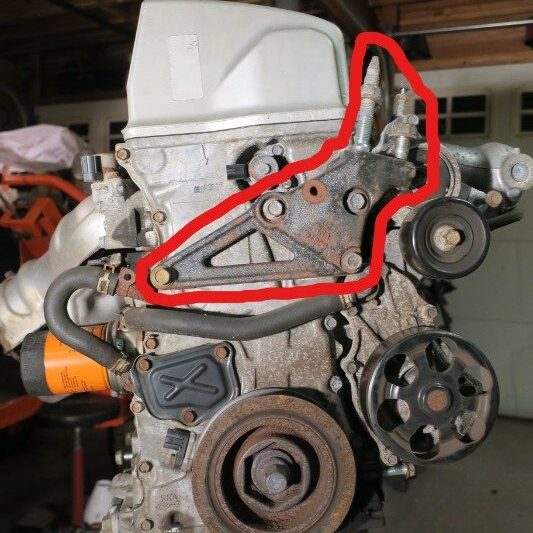
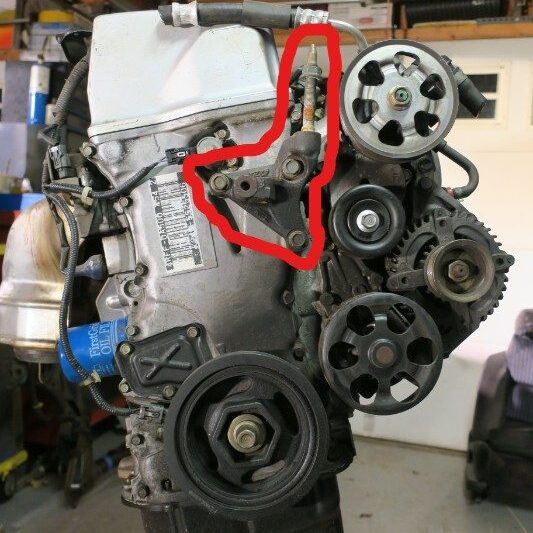
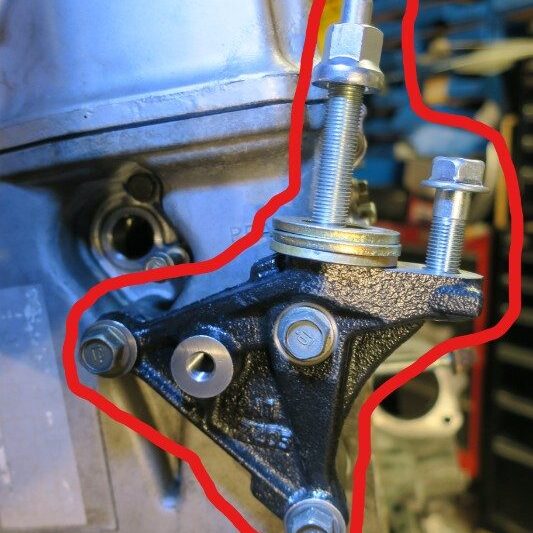
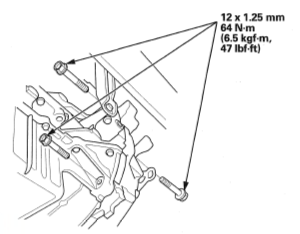
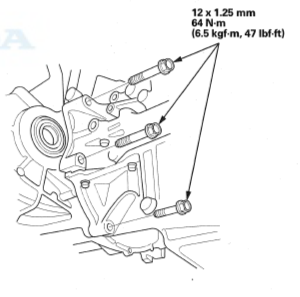
To hang the K24A engine in the 8th Gen chassis there's only one part needed to be sourced that is not original to the K20Z3 or the JDM K24; the engine side (timing side) mount. The other mounts (trans, lower and upper torque rod, and front) are unaffected when the K20Z3 oil pan and transmission is used in the conversion. The original JDM K24A engine mount is a completely different design and will not bolt up to the in chassis passenger mount. Due to the differences in the K20 and K24 timing covers, the original mount attached to the K20Z3 also cannot be used in the K24A conversion. K20Z3 mount features an additional gusset not found in other performance K engines such as the K20A2.
The K24A engine is around 1" taller than the K20Z3 and all K20 engines. The location of the mount becomes crucial to ensure oil pan to subframe clearance is maintained. The use of the 2002-2006 Honda CRV/2003-2011 Honda Element engine mount (11910-PPA-000) helps align the taller engine in the engine bay to clear the sub-frame, provide better alignment for the axles, and bolt up to the passenger engine mount attached to chassis. The CRV mount uses M12 stud, nut, and bolt. The K20Z3 mount uses M14, they are different. See Additional Parts list for correct stud nut and bolt.
Various aftermarket companies have replica's and billet versions of the 2002-2006 Honda CRV engine mount (11910-PPA-000).
Serpentine Belt System - Cooling and Power Steering
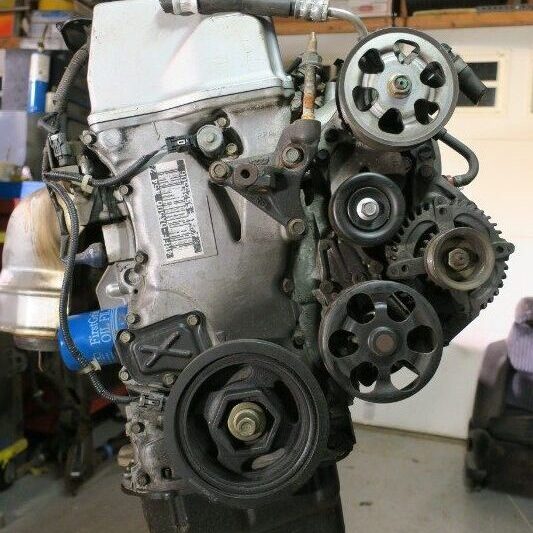
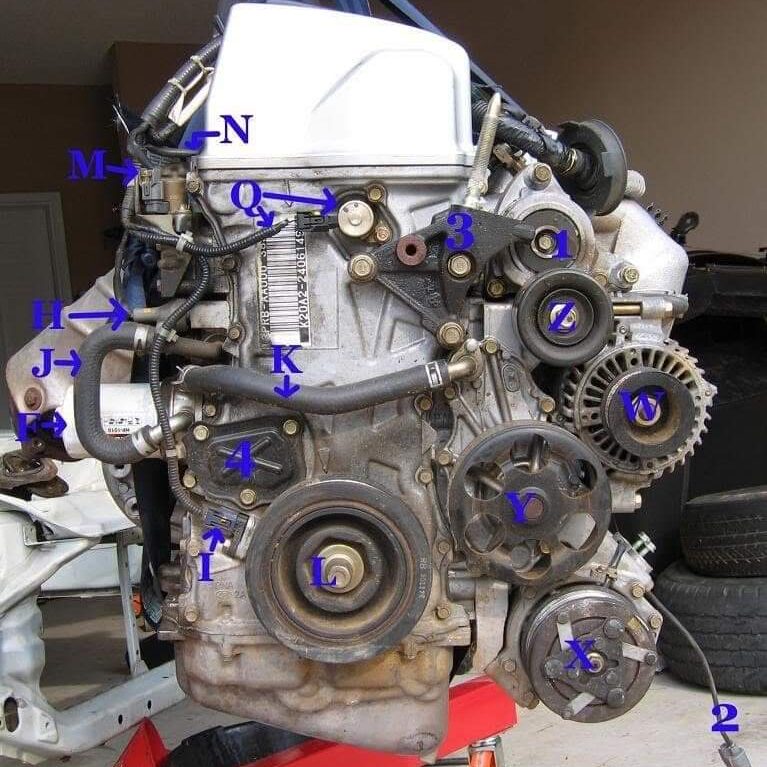
Most RBB K24A engines use a traditional hydraulic power steering system unlike the 8th gen Civic Si which uses an electric power steering system(EPS). A serpentine belt idler is found in the K20Z3 and all EPS K series engines in place of the power steering pump, similar to the USDM Honda Civic EP3 K20A3 engine. An idler pulley must be used when converting a K24A engine that originally used a power steering system.
If your sourced JDM RBB K24A was from a EPS chassis car(idler pulley in place of PS Pump), you already have all the parts and no conversion is necessary. A JDM RBB K24A for EPS Chassis Engine will also allow you to not convert to the oil cooler if you choose.
K24A engines use a larger diameter crank pulley than the K20Z3 motors.
We will be using:
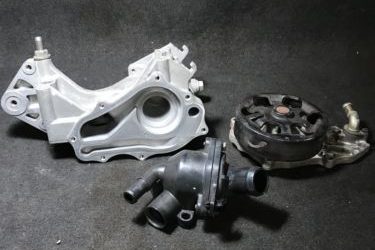
- K20Z3 water pump housing
- K20Z3 Water Pump
- K20Z3 Thermostat housing
- K20Z3 Thermostat
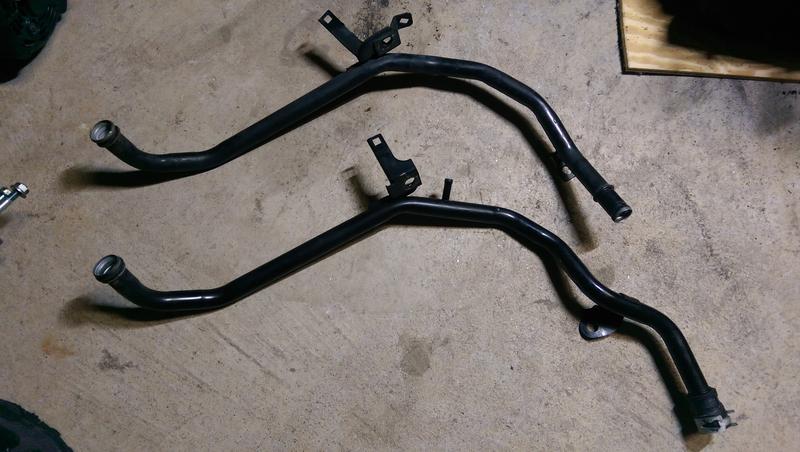
- K20Z3 Heater core hard line
- K20Z3 Coolant Bypass Hose
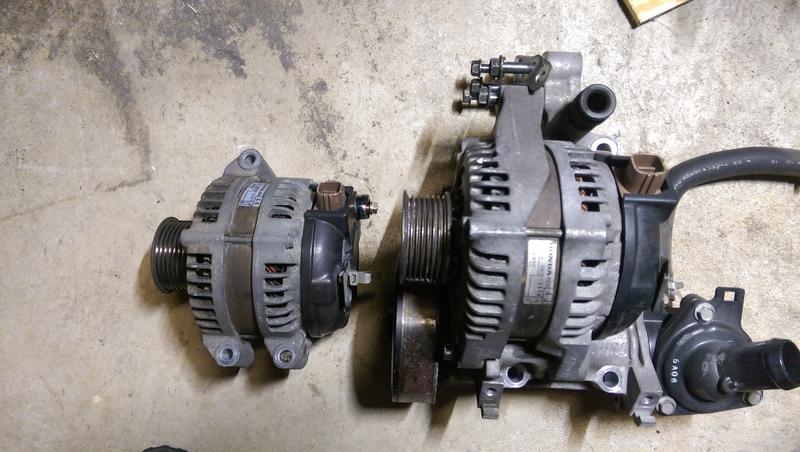
- K20Z3 alternator
- K20Z3 tensioner
- K20Z3 idle Pulley
- K20Z3 crank pulley
This ensures that the serpentine belt is standard one used in the 8th generation civic Si and K20Z3 engine as well as all coolant hoses and lines.
Some JDM K24A's water pump housing, alternator, and tensioner assembly are NOT the same as USDM K24A2 or K20A3. These unique water pump housings cannot be converted to EPS style belt system through the use of a Civic EP3 idler like the USDM counterparts.
The water pump housing on K series engines determines the alternator, water pump, and EPS idler/Power Steering pump components that can be used.
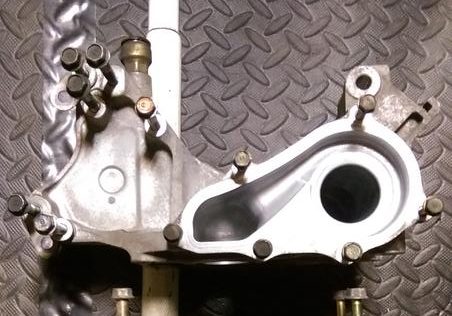
Water pump and water pump housing for K series engines with oil coolers are different than K series engines without oil coolers due to coolant line port at the water pump, this feature also effects the design of the water pump housing making water pumps and water pump housing not interchangeable, but a matched pair set.
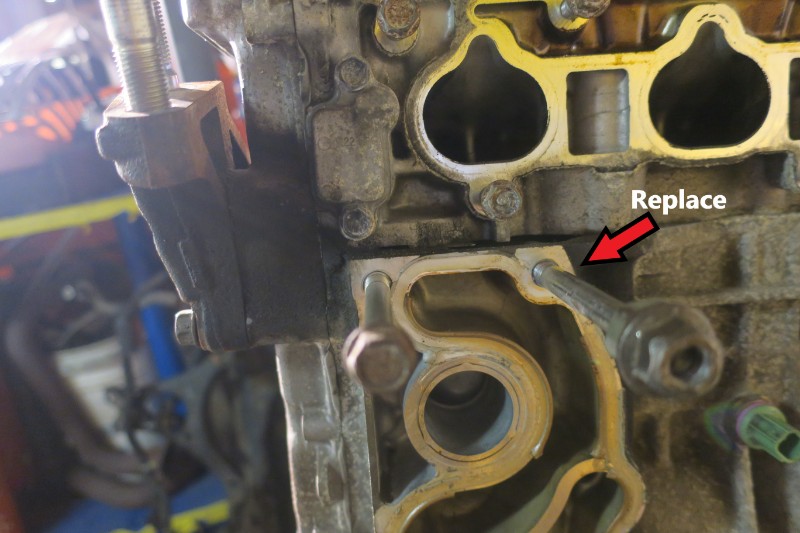
NOTE: Our RBB K24A water pump housing used one longer stud on the block that needed to be removed and replaced with K20Z3 water pump housing stud.
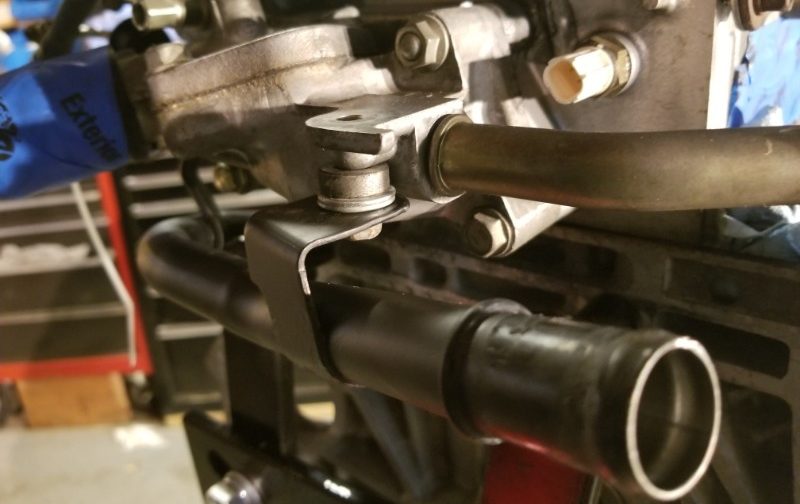
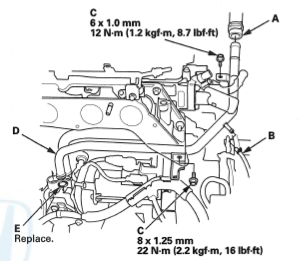
The K24A water pipe fits the taller deck block and head better, but has a nipple for the throttle body coolant hose in a different location along the length as well as at a different angle. The K20Z3 line can be used by attaching the line from bottom of EGR/Water passage on the head using spacers. EGR/Water Passage on RBB K24A engine can be used.
NOTE: Replace O-ring on Hard Line (See parts List)
Water Pump Housing Replacement
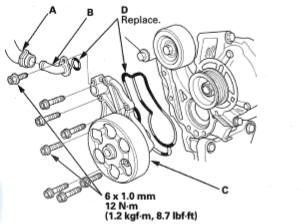
1. Remove idler pulley, tensioner, heater hard line, and coolant bypass from K20Z3 engine.
2. Remove power steering pump, tensioner, heater hard line, and coolant bypass from RBB K24A engine. Remove water pump housing, water pump, thermostat housing, and thermostat as one assembly.
NOTE: Replace VTC filter (Optional, See parts list)
3. Remove upper right water pump housing stud.
4. Remove K20Z3 water pump housing, water pump, thermostat housing, and thermostat as one assembly.
5. Remove K20Z3 upper right water pump housing stud. Install on RBB K24A engine in same location.
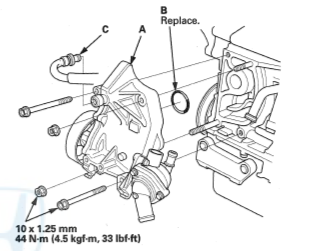
6. Clean mating surface of K20Z3 water pump housing and RBB K24A block. Replace water pump housing O-ring(see parts list).
7. Install K20Z3 water pump housing, water pump, thermostat housing, and thermostat on RBB K24A engine.
8. Replace water pump(optional).
9. Replace o-ring on K20Z3 water pipe (hard line).
10. insert into housing. attach to block to 16 lb•ft torque.
11. using washers create spacere to attach water pipe to EGR/Water passage. tighten to 8.7 lb•ft torque.
Oil Cooler
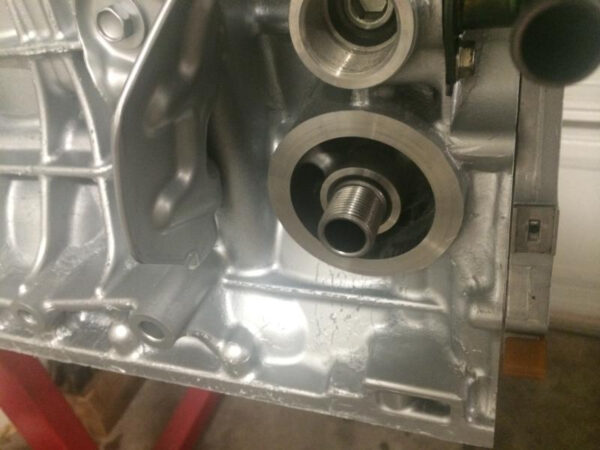
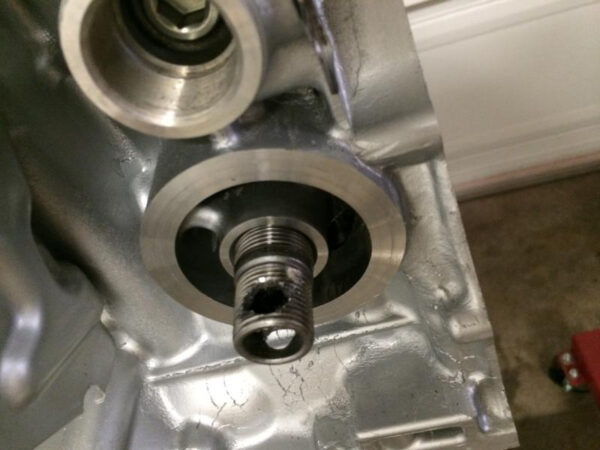
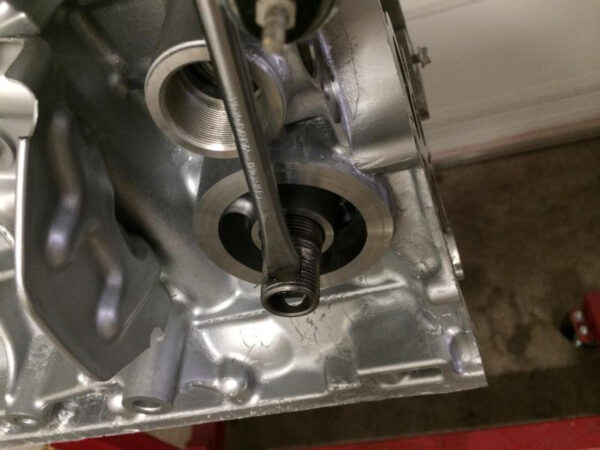
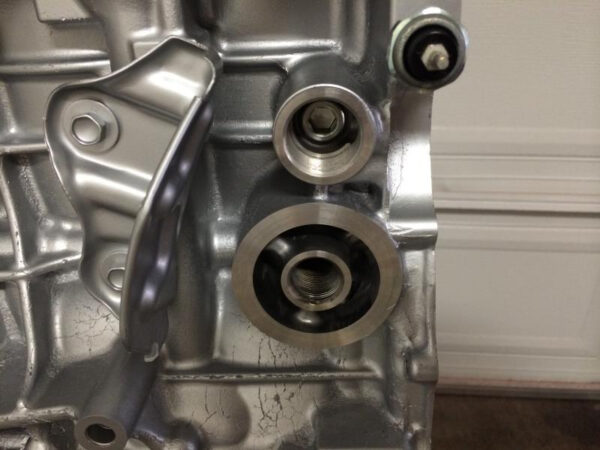
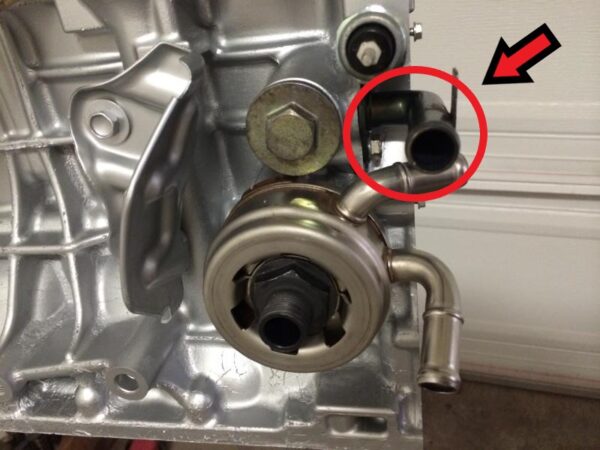
Using the K20Z3 water pump means we get to use the Oil Cooler from the K20Z3. To use the oil cooler the filter screw on inlet has to be removed from the K24A block to mount the oil cooler. This can be accomplished with large locking pliers(Vice-grip pliers) or by drilling hole in filter inlet and using prybar or screwdriver to screw it out of the block.
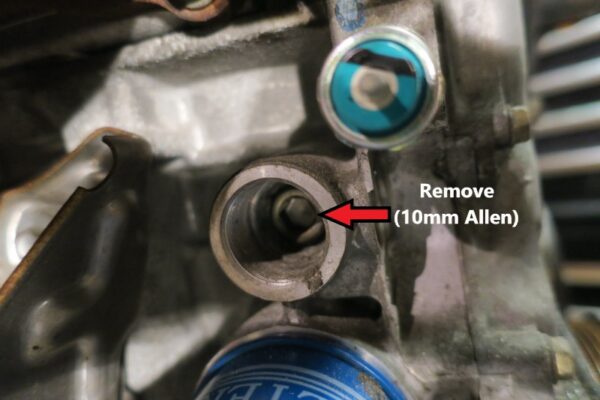
The coolant return from the oil cooler has to be routed back into the block. The RBB K24A block has all the provisions for the oil cooler return:
- Remove INTERNAL Cooler return plug from K24A block using 10mm hex driver
- Clean Cooler return port in block
- Attach cooler return inlet fitting (K20Z3). Torque to 8.7 lb•ft.
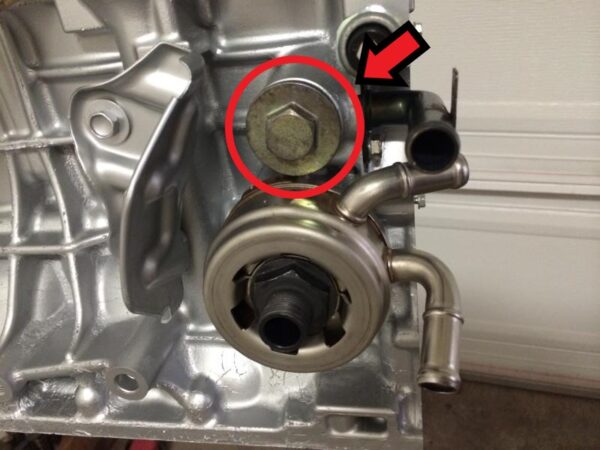
NOTE: Use new O-ring (See Parts List) - Attach EXTERNAL cooler return block plug (K20Z3). Torque to 54 lb•ft.
- Attach K20Z3 oil filter heat shield
- Attach K20Z3 Oil Cooler. Torque to 54 lb•ft.
NOTE: Oil cooler has tab to ensure cooler is correctly "clocked"
NOTE: Use new O-ring (See Parts List)
Oil Pan
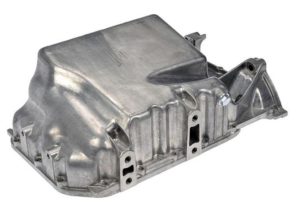
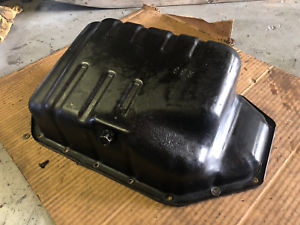
The 8th generation Civic and K20Z3 engine use a torque mount attached to the aluminum oil pan for the primary engine torque movement isolation. The RBB K24A engine like many K24 motors use a stamped steel oil pan. The K20Z3 oil pan and bolts have to be used for the conversion to retain lower torque mount.
K20Z3 oil pan is deeper than the RBB k24A steel pan, as well as deeper than the K20A2 aluminum oil pan.
Oil Pan Replacement
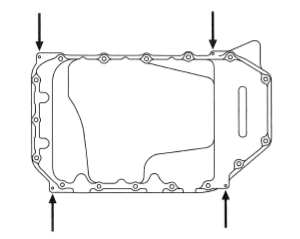
1 Unbolt K20Z3 oil pan. SAVE BOLTS. Remove K20Z3 Oil Pan by prying on cast tabs to separate from block.
2. Unbolt K24A oil pan. DO NOT DAMAGE BLOCK MATING SURFACE. Remove oil pan studs.
3. Clean mating surface of K20Z3 oil pan and K24A Block.
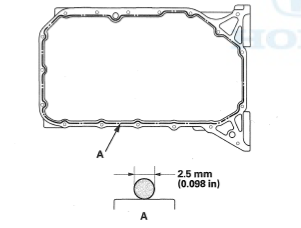
4. Apply Hondabond to oil pan matting surface.
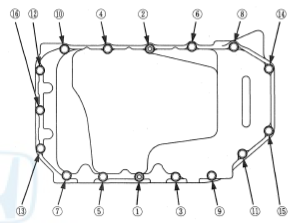
5. Torque to 8.7 lb•ft in correct pattern.
NOTE: Remove excess Hondabonda from timing chain cover section if timing chain cover is removed.
Oil Pump
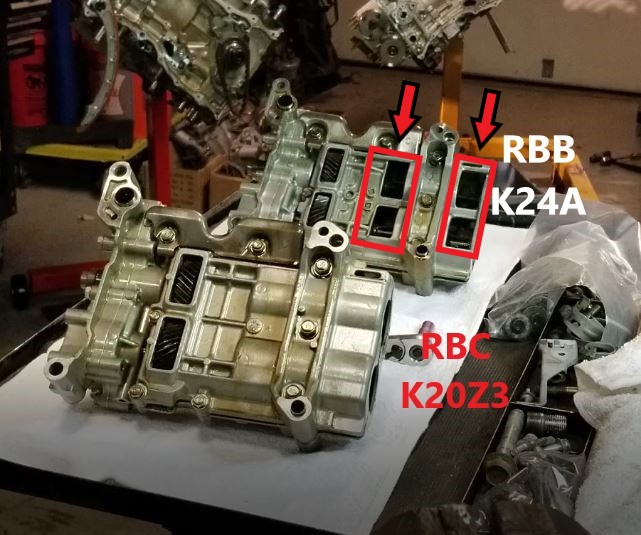
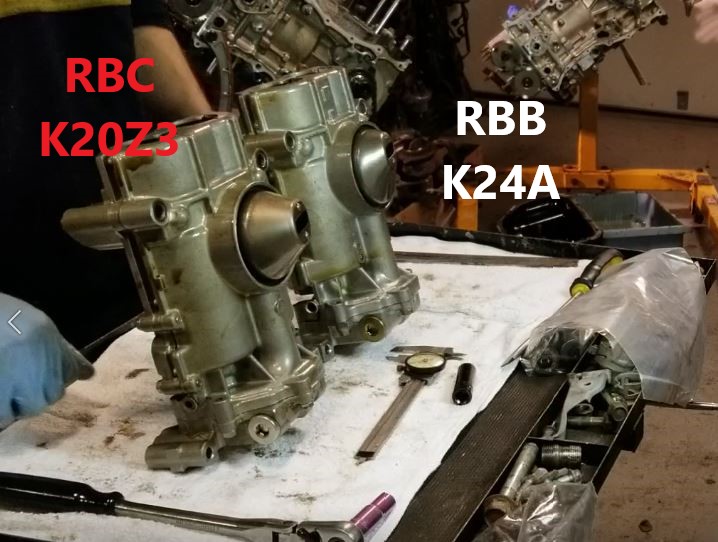
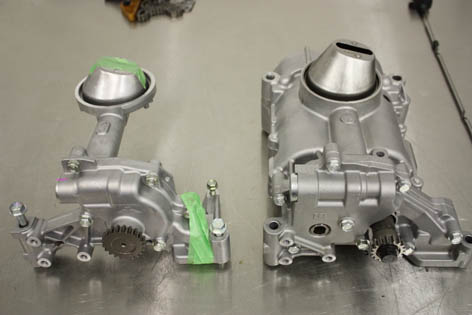
Because of the oil pan depth differences the K20Z3 oil pump features a deeper pick up. Both the RBB K24A oil pump and K20Z3 oil pump use counter rotating shafts for vibration elimination and smooth performance.
The RBB K24A or converted K20A2 oil pump must be used instead of the K20Z3 oil pump. The RBB K24A oil pump has additional material removed from rear cover to clear the connecting rods/crank during rotation around the bottom dead center. Due to alignment pin differences between our K20Z3 oil pump and the RBB K24A oil pump rear covers we were not able to swap rear covers to use our K20Z3 oil pump. Using the K24A dip stick to determine the oil level ensures the pump does not starve for oil as the dip stick levels are relative to the oil pick up location. New capacity is 5.75 QTS due to deeper K20Z3 pan.
We will be using:
- K24A Oil Pump
- Honda PN: 15100-RAA-A02
- K24A Oil Pump Chain Guide
- Honda PN: 13460-PNA-004
- K24A Oil Pump Chain Tensioner
- Honda PN: 13450-RAA-A02
TalonXRacer created a great write up on K20A.org forum and did a great deep dive into K series oil pumps including the K20Z3. Check out it out here.
A modified K20A2 pump and kit is recommended for engines spinning beyond 8000 RPM. It has been found to be superior against cavitation at high RPM's. However it does not use counter rotating shafts that help run the engine smooth and vibration free.
For anyone upgrading to a K20A2 pump the below video does a great job documenting all required steps and parts for the conversion.
Cams
RBB K24A cams are claimed by some to be identical to 04-05 USDM K24A2 cams in terms of duration and lift on all lobes.
According to Brian Crower there are various lift and duration differences between K20Z3, which closely resemble K20A2 cams and JDM K20A cams, and quoted K24A2 cams. It is hard to know what will make the most power with our RBC intake manifold and deeper stroking RBB K24A.
We chose to keep the stock RBB K24A cams for ease of swap. Power differences are minimal and arguable.
We will be using:
- RBB K24A Cams
- RBB K24A Roller Rocker Assembly
- RBB K24A Lost Motion Assembly
Timing Chain
All K24's use a longer chain and chain guides due to the added height of the block as compared to K20 motors. K24 Timing chains contain 176 links while K20 Timing Chains contain 170 links, they are not interchangeable. Some K20Z3 engines contained an improved(lengthened) top chain guide to ensure the chain does not have a chance of skipping a tooth. It is located on the head above the two cam gears. Use the K20Z3 upper chain guide.
We will be using the:
- K24A Timing Chain
- Honda PN: 14401-R40-A01
- K24A Cam Chain Guide
- Honda PN: 14530-RZA-A01
- K24A Cam Chain Tensioner Arm
- Honda PN: 14520-RAA-A01
- K20Z3/K24A2 Cam Chain Tensioner
- Honda PN: 14510-PRB-A01
- K20Z3 Upper Chain Guide
- 14540-RAA-A02
VTC
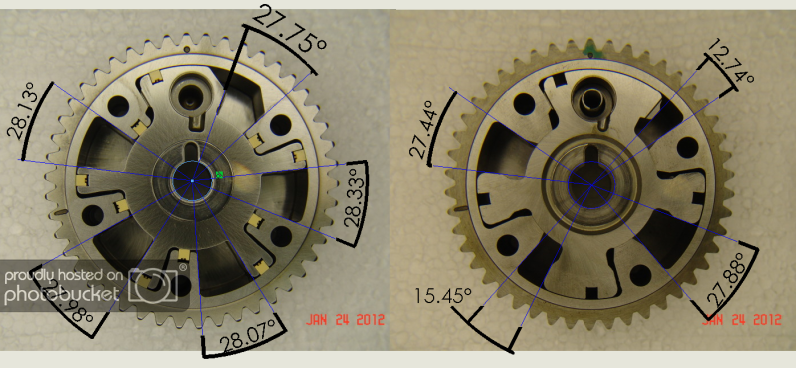
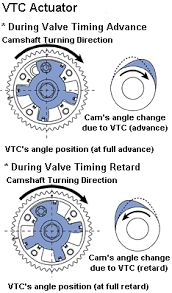
To get the most power and tuning ability out of the K24A we have chosen to use the 50° VTC intake cam gear(Actuator) from the K20Z3. The gear allows for twice as much advancement than the standard 25° VTC intake cam gear found on all K24A's.
The original K24A used long runner, small diameter intake manifold. Primarily designed for maximum torque tuning. Using the K20Z3 intake manifold and K24A cam's it was crucial to give our tuner the ability to tune the engine to attain the best power curve. The 50° VTC intake cam gear will allow our tuner to maximize power in our K24A/K20Z3 hybrid engine.
For Road Racing applications or where it is likely the engine will be taken over 8,000 RPM it is recommended to pin the VTC gear to a maximum of 45° travel.
DO NOT USE IMPACT GUN ON VTC GEAR
VTC Gear(Actuator) Replacement
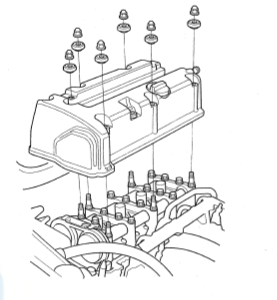
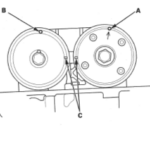
1. Remove Valve Cover, Set No. 1 Piston to TDC. Remove Crank Pulley
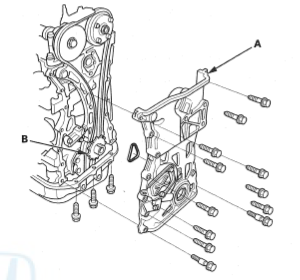
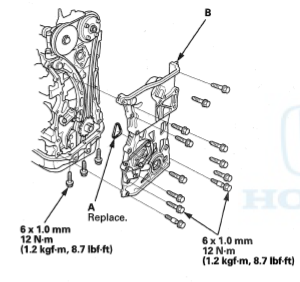
2. Remove Cam Chain cover. Remove CKP Pulse Plate
NOTE: Lower 2 bolts on cam chain cover case are dowel bolts. Do not mix up.
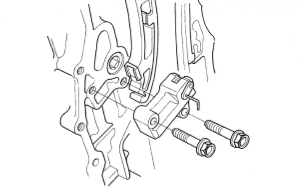
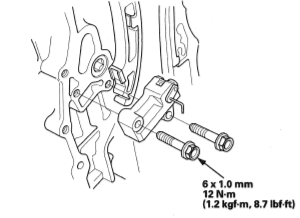
3. Remove Auto-tensioner.
NOTE: Rotate crankshaft counter clock wise until auto-tensioner lock aligns with hole an insert 1mm pin (large safety pin or sewing needle) if reusing auto-tensioner.
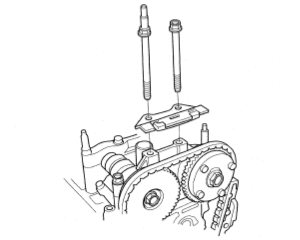
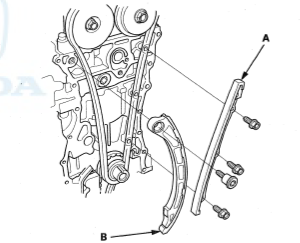
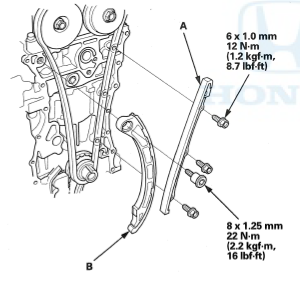
4. Remove Upper Chain Guide, Remove Cam Chain Gude and Chain Tensioner Arm . Remove Cam Chain.
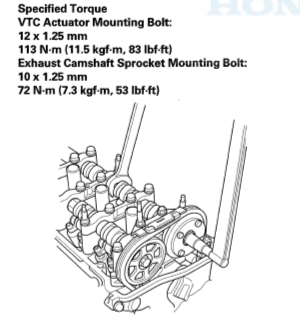
5. Using 27mm open end wrench, hold intake Camshaft. Remove VTC gear.
NOTE: Ensure RBC(K20Z3) VTC actuator is in locked position, no movement between center and chain sprocket.
6. Install RBC VTC gear. Tighten to Spec.
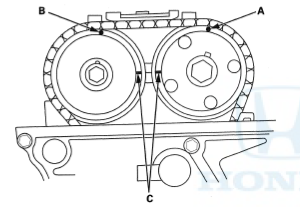
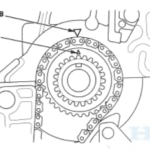
7. Align Crankshaft and camshafts to TDC.
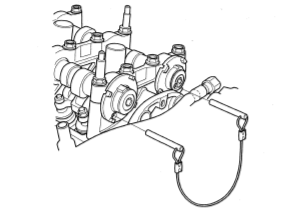
NOTE: Use 5mm drill bit or 3/16" drill bit to lock cams.
8. Install K24A timing chain.
9. Install timing chain guides. Torque to specification
10. Install tensioner. Verify cams and crank at TDC. Remove Pin from tensioner.
11. Remove Cam locking pins
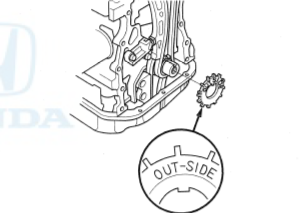
12. Install CKP Plate. Plate marking "OUTSIDE" should be visible.
NOTE: Rotate engine clockwise 2 full revolutions and return to TDC. Verify Cams and Crank are at TDC using marks.
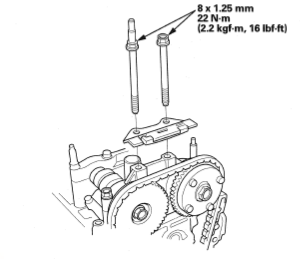
13. Install upper timing chain guide. Torque to specification.
14. Remove all hondabond from timing chain cover surface and block/head mating surface.
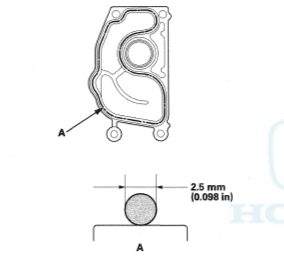
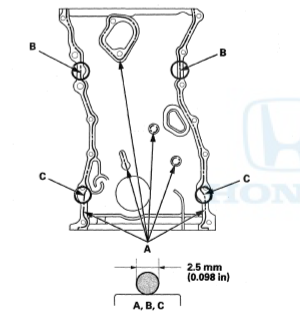
15. Apply hondabond to timing chain cover as shown. Replace timing chain cover o-ring gasket (See parts list)
16. Reinstall timing chain cover. Tighten to specification
NOTE: Lower timing chain cover bolts (QTY 2) have integrated dowel. Use only in lower two holes for better alignment.
Sensors/Wiring
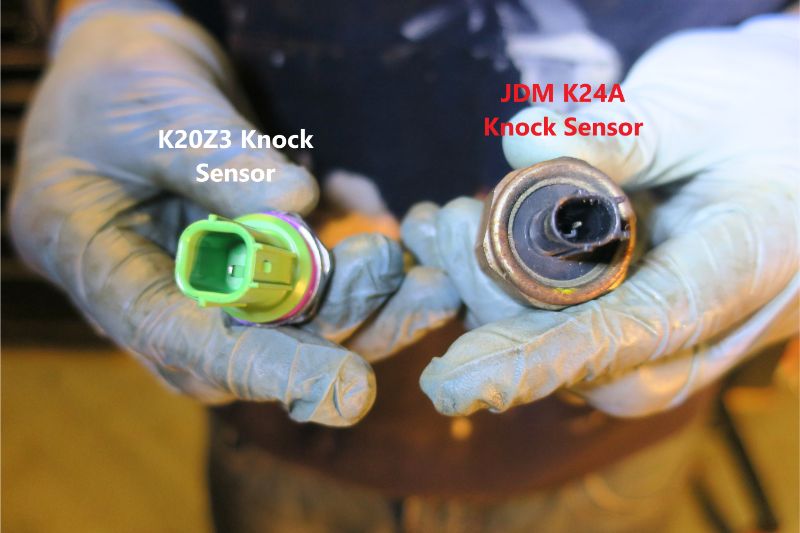
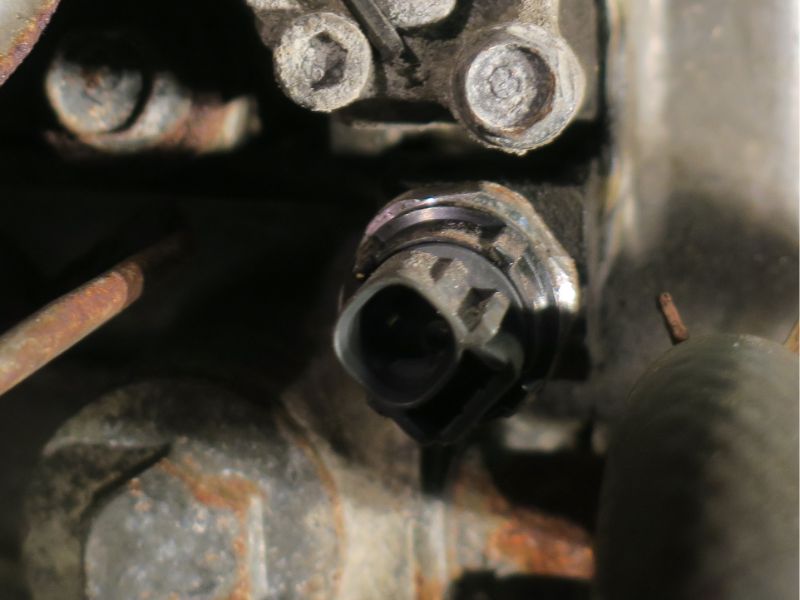
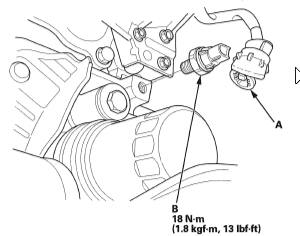
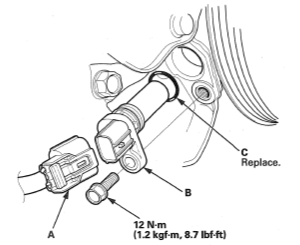
We will be using the 8th gen Civic Si K20Z3 harness and ECU. The 8th Gen Civic Si K20Z3 engine contains some sensors that are different in plug design than other K series engines. The K24A CKP or Crank Position Sensor is wired differently than the K20Z3 sensor internally. They are not interchangeable.
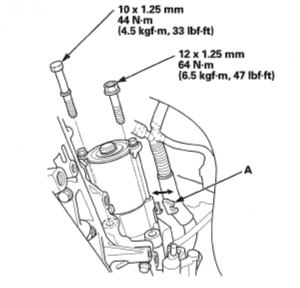
The starter solenoid signal connector is unique on the 8th gen Si compared to other K series starters.
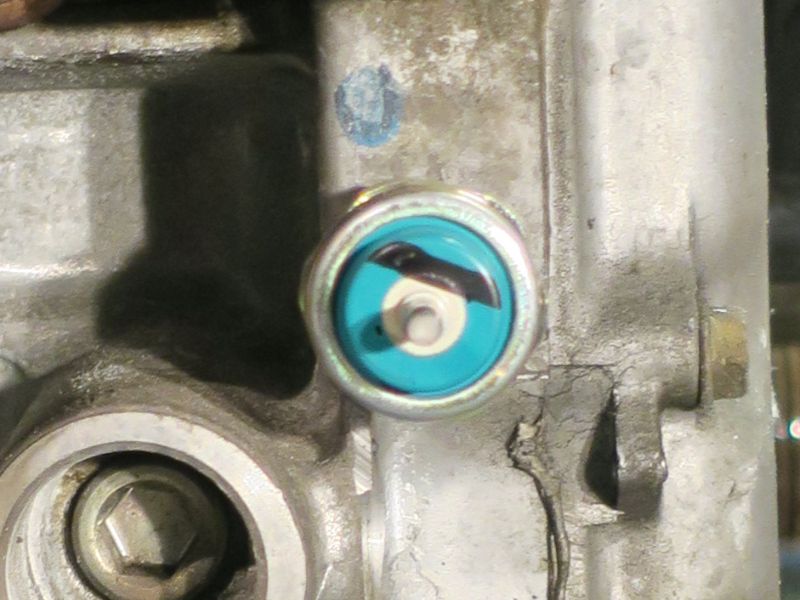
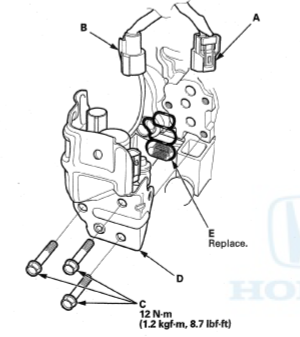
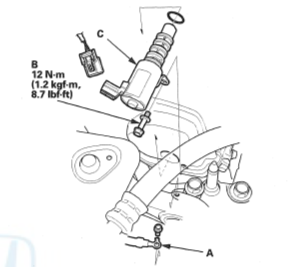
JDM engines will not have an additional pressure sensor on the VTEC Spool valve that is found on USDM K series engines. However the JDM VTEC Spool valves will have provisions for the additional pressure sensor and the pressure sensor can either be transferred or the whole VTEC Spool valve from the K20Z3 can be used.
VTC Selenoids are interchangeable between the JDM RBB K24A and the USDM K20Z3.
K20A.org forum member Froth has written a great deep dive in K series sensor interchangeability and Part Number post.
We will be using:
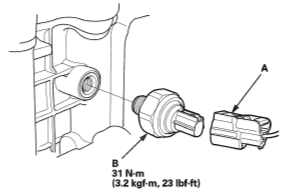
- K20Z3 Knock Sensor
- Honda PN: 30530-PRC-003
- K20Z3 Oil pressure Switch
- Honda PN: 37241-RNA-A01
- K20Z3 Crank Position Sensor(CKP)
- Honda PN: 37500-PNB-003
- Starter
- Honda PN: 31200-RRA-A51
- K20Z3 VTEC Spool Valve
- Honda PN: 15810-PRB-A03
See Parts List for various o-rings PN's.
All other Sensors on RBB K24A are compatible with Civic Si Harness and ECN and DO NOT need to be changed
intake/exhaust components
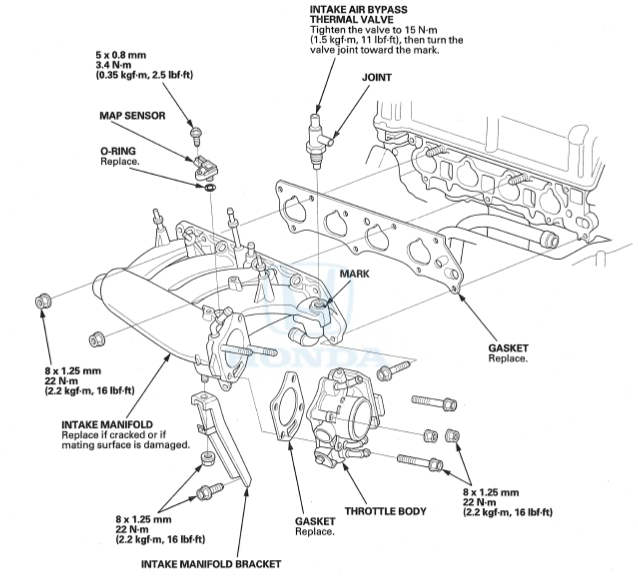
The K20Z3 RBC intake manifold is arguably one of the best OEM intake manifolds for Honda K series engines. Short runners and large plenum are designed for high RPM and high horsepower tuning. While the RBB K24A intake manifold is a small diameter, long runner, small plenum intake manifold designed for all around good MPG and torque.
The RBC intake manifold is a direct fit to the RBB K24A head. Unlike the K20A(K20A2) and K20Z1 heads which require the RBC intake manifold to be cut down to separate the integrated coolant passage from intake manifold. The use of the RBC intake manifold allows us to keep the original intake, or any aftermarket intake for the 8th gen Civic Si.
NOTE: It is not necessary to remove fuel rail or injectors from intake manifold. Removing throttle body aids in reaching intake manifold bots. Always use a new gasket. Spacer(stacked washers) and longer bolt required if intake manifold bracket is retained.
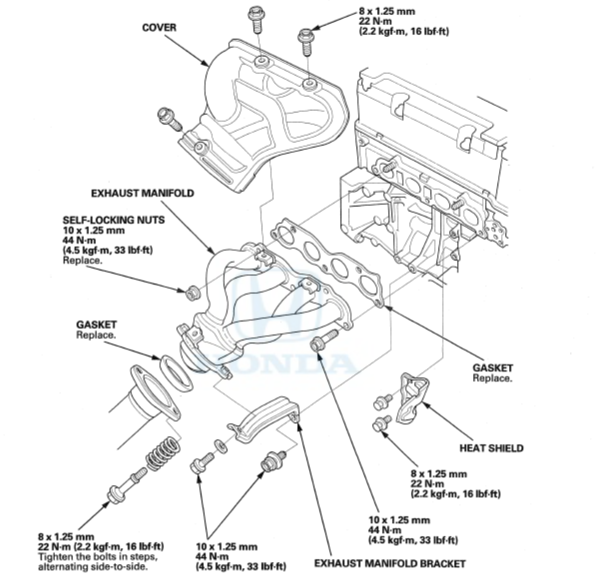
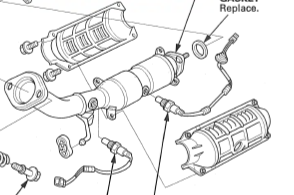
The K20Z3 Exhaust manifold or header must be used. Some after market headers may not have the correct clearance for the firewall once a K24A engine is fitted in the 8th gen Civic Chassis. If using stock catalytic converter, remove heat shield from catalytic converter for clearance.
NOTE: Always use a new exhaust manifold gasket. Exhaust manifold bracket should be removed
Install Preperation
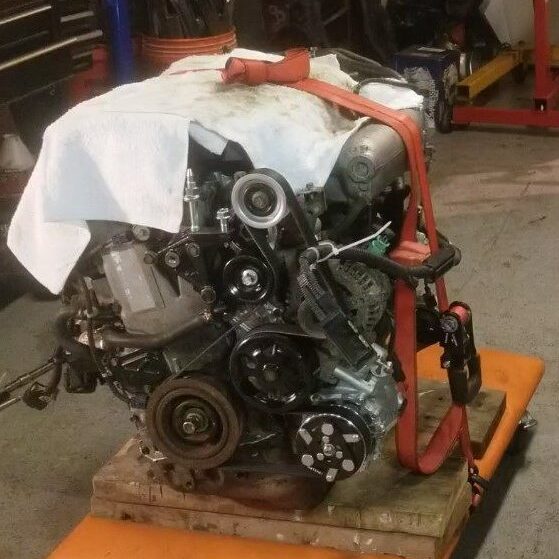
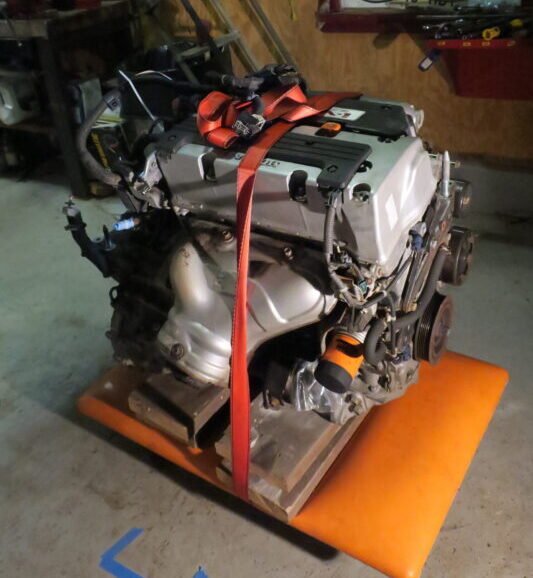
The engine conversion is complete. It is ready to merge with transmission, install harness, and is ready for installation into the chassis.
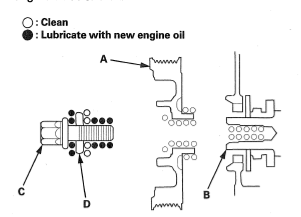
1. Prep K20Z3 crank pulley and bolt as shown. This will aid in correct torque setting.
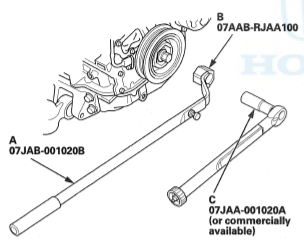
2. Install Crank Pulley. Torque to 36 lb•ft.
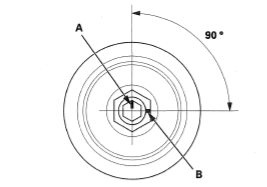
3. Tighten bolt additional 90º .
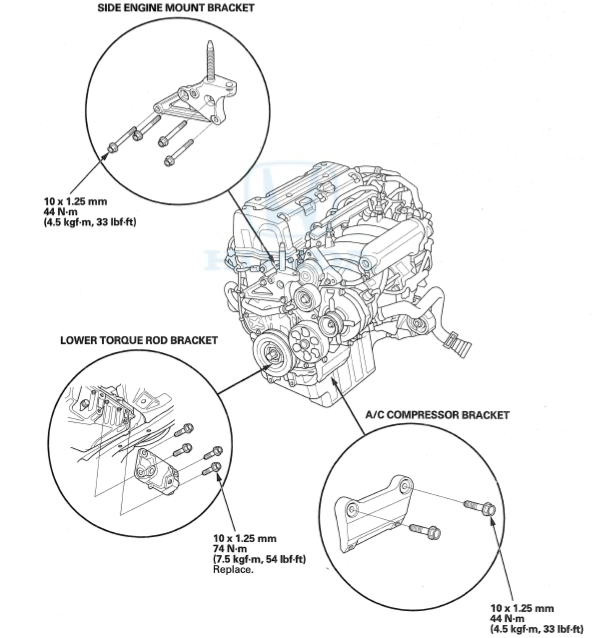
4. Install A/C compressor bracket, lower torque rod bracket, and engine mount. Torque to specification
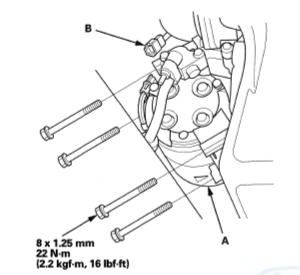
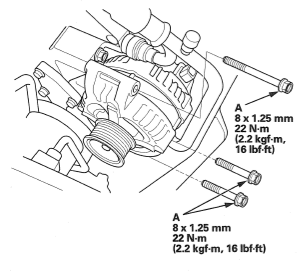
5. Install A/C compressor. Install alternator. Torque to specification.
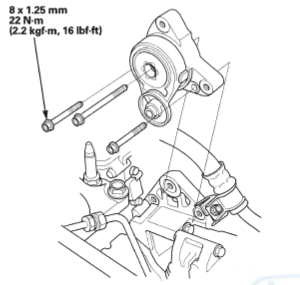
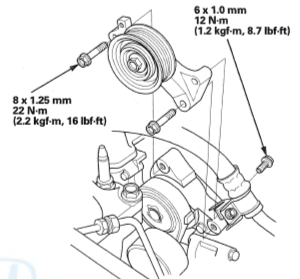
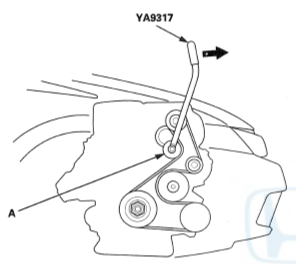
6. Install tensioner, idler pulley, Install belt.
7. Install evap purge solenoid and brake booster hard line on valve cover. Torque to 8.7 lb•ft
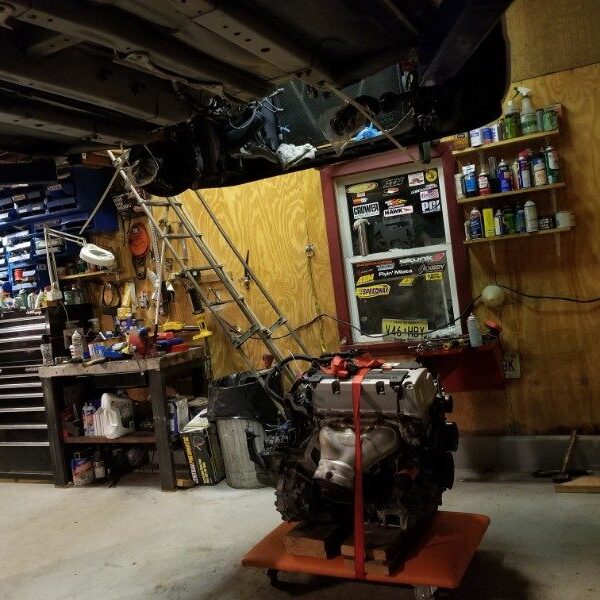
8. Remove from engine stand and place on dolly.
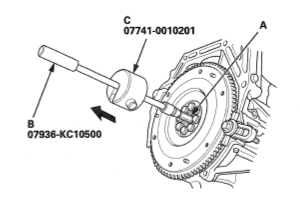
9. Check for input shaft bushing in crankshaft on flywheel end. Remove with slide hammer.
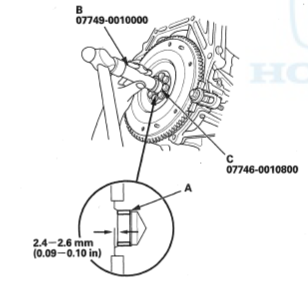
10. Install NEW input shaft bushing in crankshaft on flywheel end to specified depth
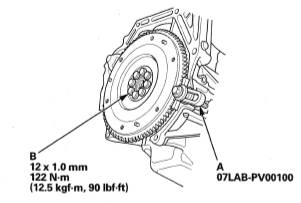
11. Install flywheel. Torque to specification.
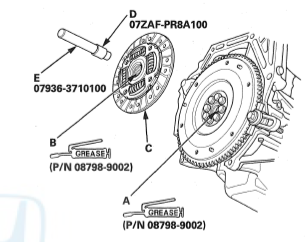
12. Install clutch disk. Use MINIMAL amounts of high temp grease
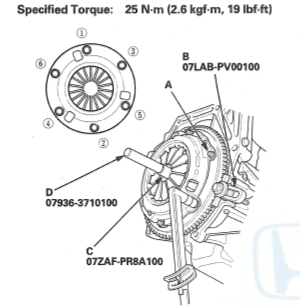
13. Install pressure plate. Torque in star pattern to specified torque.
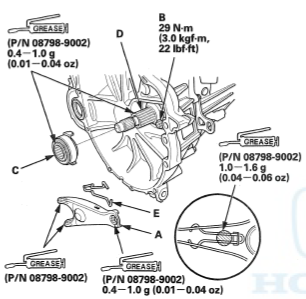
14. Grease clutch fork and throw out bearing. Install in transmission with fork boot. Ensure clutch fork moves freely and throw out bearing rides smooth on the input shaft collar.
15. Remove clutch disk alignment tool. Install transmission, carefully aligning input shaft until transmission sits flush with the engine.
16. Torque to specification
17. Install clutch cover. Torque to specification.
18. Install engine wiring harness.
19. install any and all coolant hoses and vacuum hoses.
The engine/trans is ready for a bolt in installation into the chassis.
Happy Wrenching !!!
